


Metallic Epoxy Flooring — The Complete Guide
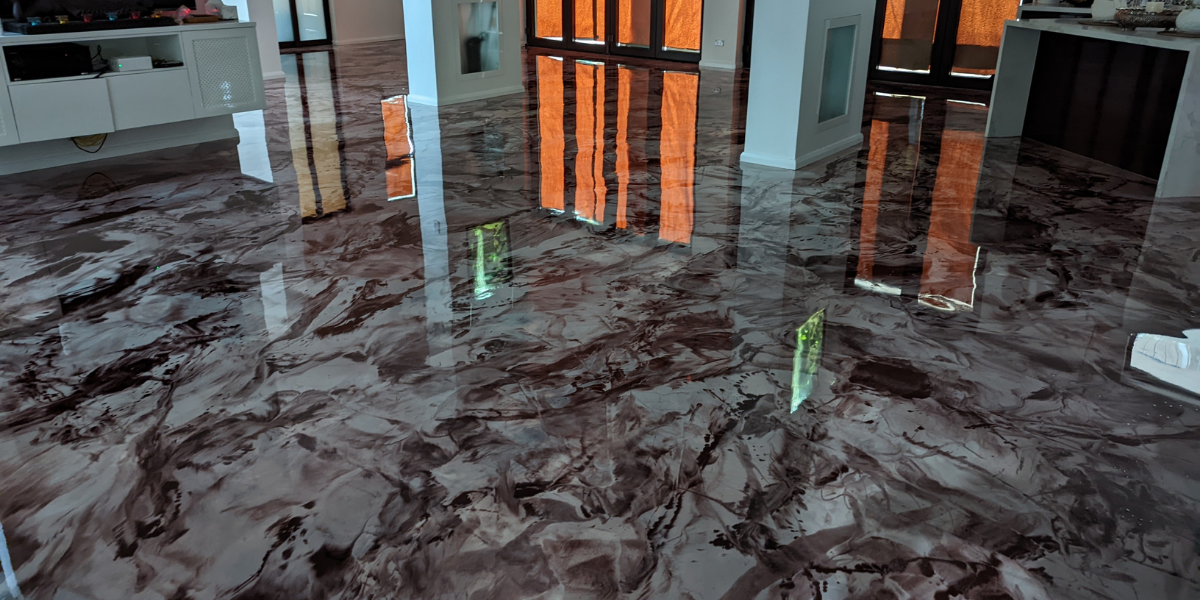
Metallic epoxy flooring is one of the most visually stunning floor finishes available — a high-gloss, seamless surface with a unique three-dimensional, marbled effect that looks different from every angle. Once reserved for high-end commercial spaces, metallic epoxy is now accessible for residential garages, workshops, showrooms, and retail environments.
This guide covers everything you need to know — how it works, where to use it, how to apply it, and what it costs.
What Is Metallic Epoxy Flooring?
Metallic epoxy is a two-component, 100% solids, self-levelling epoxy resin system infused with metallic pigment powders. When applied, the pigments move and swirl through the wet epoxy, creating a unique, one-of-a-kind finish that can't be replicated exactly — every floor is different.
Unlike standard epoxy coatings, metallic epoxy is both a decorative and functional floor system. It delivers:
- A high-gloss, mirror-like finish with depth and movement
- 100% solids formulation — no solvents, no shrinkage, maximum film thickness
- Self-levelling properties for a smooth, seamless result
- Superior adhesion to properly prepared concrete
- Scratch, chemical, UV, and moisture resistance

Where Can You Use Metallic Epoxy Flooring?
Metallic epoxy suits any space where aesthetics matter as much as performance:
- Residential garages — showroom-quality finish for car enthusiasts
- Home interiors — living areas, kitchens, and entertainment spaces
- Retail showrooms and boutiques — premium visual impact for customers
- Workshops and studios — durable and impressive
- Commercial and hospitality spaces — bars, restaurants, reception areas
Metallic Epoxy vs Standard Epoxy — What's the Difference?
| Feature | Standard Epoxy | Metallic Epoxy |
|---|---|---|
| Finish | Solid colour, flat gloss | 3D metallic, marbled effect |
| Uniqueness | Consistent, repeatable | Every floor is one-of-a-kind |
| Solids content | 50–100% solids (can be 100%) | typically high solids (often 100%) but system-dependent |
| Self-levelling | depends on product (can be self-levelling) | typically self-levelling (required for flow effects) |
| Application skill | Beginner–intermediate | Intermediate–advanced |
| Best for | Functional, high-traffic areas | Decorative + functional spaces |
How to Apply Metallic Epoxy Flooring — Step by Step

Step 1: Surface Preparation
Proper preparation is critical. The concrete must be clean, dry, and free of contaminants. Repair any cracks using a concrete bog or epoxy filler, sand smooth, and vacuum thoroughly. Any moisture in the slab must be addressed with a moisture barrier before proceeding.
Step 2: Apply the Primer Coat
Apply one coat of Ultra Primer tinted with a Black or Charcoal Tint Pack. The tinted primer creates a dark base that enhances the depth and contrast of the metallic pigments above. Allow to cure fully before proceeding.
Step 3: Patch and Sand
After priming, patch any remaining imperfections using leftover primer mixed with Sikadur 513 Powder. Once cured, sand with 150-grit and vacuum clean.
Step 4: Apply the Metallic Epoxy Coat
Mix the Ultra Metallic 15L Kit thoroughly and add 3 Silver Pearl pigment packs per kit plus 1L of GP Thinners to reduce bubbles. Pour and spread using a flat magic squeegee, wearing spike shoes to avoid footprints. Work in sections of 15–20 sqm per kit, maintaining a wet edge at all times.
Important tips:
- Do not apply if temperatures exceed 25°C
- Work as a team — one person mixing and pouring, others spreading and back-rolling
- Apply highlights sparingly (1–1.5L at a time) for the best swirl effect
- Remove bubbles with a solvent spray or low-pressure air blower
- Continuous mixing and pouring is essential to avoid colour inconsistencies
Step 5: Apply a Clear Topcoat (Recommended)
Once the metallic coat has cured, lightly sand with 220-grit and apply a clear protective topcoat. We recommend Xtreme polishing systems T200 clear coat for maximum scratch, UV, and chemical resistance. As one of our customers noted: "Good product to produce high quality metallic epoxy flooring finishes. Definitely needs a T200 or polyurethane top coat to protect it."
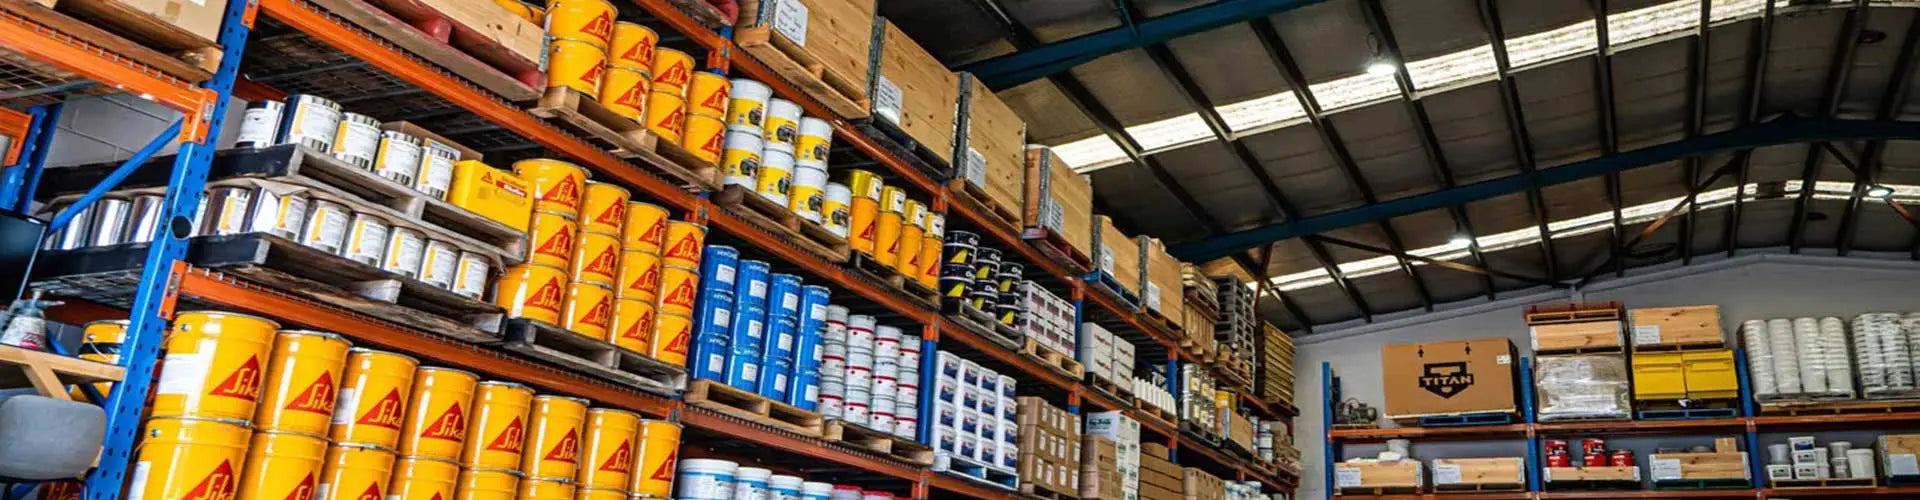
What You'll Need — Full Shopping List
- Ultra Primer ( tinted black or charcoal)
- Ultra Metallic 15L Kits
- 3 x Metallic Powder Packs per kit
- Clear Polyurethane Uv Seal
- Magic Squeegees
- Spike Shoes
- 3 x 460mm Roller Trays and Frames
- 6 x Brushes
- White Rags
How Much Does Metallic Epoxy Flooring Cost?
The Ultra Metallic 15L Kit is priced at $350 AUD per kit, covering approximately 15–20 sqm per coat as a metallic floor.
For a typical 40 sqm garage, budget for approximately 2–3 kits of Ultra Metallic plus primer, topcoat, and tools. The result is a floor that looks like it belongs in a luxury showroom — at a fraction of the cost of professional installation.
Shop the Ultra Metallic 15L Kit — $350 AUD →
Frequently Asked Questions
Can I apply metallic epoxy myself?
Yes — but it requires more preparation and teamwork than a standard epoxy kit. Read the full application instructions carefully, work in a team of 2–3, and avoid applying in temperatures above 25°C.
How long does metallic epoxy flooring last?
With proper surface preparation and a protective clear topcoat, a metallic epoxy floor can last 10–20 years in residential settings and 5–10 years in high-traffic commercial environments.
Can metallic epoxy be used outdoors?
Metallic epoxy is designed for indoor use. For outdoor or UV-exposed areas, a UV-stable polyaspartic topcoat is essential to prevent yellowing.
What colours are available?
Metallic pigment packs are available in a range of colours including Silver Pearl, Gold, Copper, and more. Multiple pigments can be combined for custom effects.
Ready to Transform Your Floor?
Metallic epoxy flooring delivers a finish that's truly one of a kind — no two floors are ever the same. Whether you're coating a garage, studio, or commercial showroom, the result is a floor that stops people in their tracks.


