


Epoxy Flooring

Best Concrete Sealer for Driveways & Paving Areas
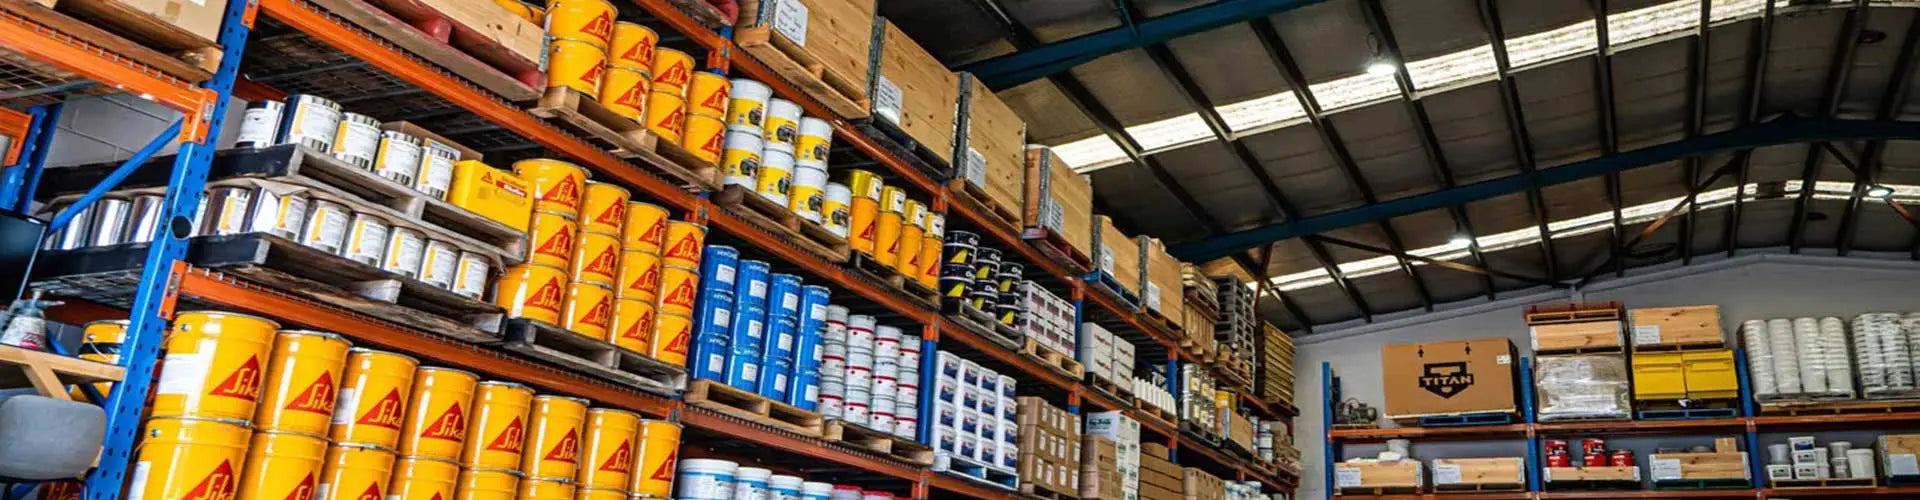
Best Concrete Sealer for Driveways & Paving Areas in Australia Whether you're sealing a freshly poured concrete driveway, a brick paved entertaining area, or an exposed aggregate path, choosing the right concrete sealer makes all the difference. The right product protects against oil stains, UV damage, water ingress, and surface wear — while enhancing the natural look of your concrete or pavers. At Epoxy Warehouse, we supply Australia's leading concrete sealer brands including Nutech PaveCoat and Crommelin Enhance — two of the most trusted ranges for residential and commercial driveway sealing. Why Seal Your Driveway or Paving Area? Unsealed concrete and pavers are porous — they absorb oil, grease, water, and contaminants that cause staining, cracking, and surface degradation over time. Applying a quality concrete sealer: Repels oil, fuel, and water stains Protects against UV fading and surface wear Enhances the colour and texture of concrete, pavers, and exposed aggregate Reduces weed growth in paving joints Makes cleaning significantly easier Extends the life of your driveway or outdoor area For driveways specifically, you need a sealer that can handle vehicle traffic, oil drips, and Australian UV conditions — which is why product selection matters. Nutech PaveCoat — Australia's Leading Driveway Concrete Sealer The Nutech PaveCoat range is one of the most popular concrete sealer systems in Australia for driveways, paving, and outdoor concrete surfaces. Developed specifically for Australian conditions, PaveCoat products offer excellent UV resistance, durability, and ease of application. Nutech PaveCoat Concrete Sealer The flagship Nutech PaveCoat Concrete Sealer is a solvent-based acrylic sealer designed for concrete driveways, exposed aggregate, and paved areas. It provides a clear to slightly amber finish that enhances the natural colour of the surface while forming a protective film against water, oil, and UV damage. Best for: Concrete driveways, paving, slates, factories, workshops, stencils paving Finish: Gloss, Matt to high gloss Nutech PaveCoat H2O Water Based Concrete Sealer For those preferring a low-VOC, water-based option, the NuTech PaveCoat H2O Water Based Concrete Sealer delivers strong protection with easier cleanup and reduced odour. Ideal for residential driveways where solvent fumes are a concern. Nutech PaveCoat Spray On Concrete Sealer The NuTech PaveCoat Spray On Concrete Sealer is formulated for fast, efficient application over large driveway and paving areas using a pump sprayer. It's a popular choice for contractors and DIYers sealing large surface areas quickly. Best for: Large driveways, paving courts, pathways Application: Spray application Key benefit: Fast coverage, efficient for large areas Nutech PaveCoat Same Day Sealer (Cure & Seal) The Nutech PaveCoat Same Day Sealer is a cure and seal product — meaning it can be applied to freshly poured concrete on the same day as placement. It cures the concrete while simultaneously sealing the surface, saving time on new driveway projects. Best for: Freshly poured concrete driveways Key benefit: Cures and seals in one step Nutech PaveCoat AntiSlip — Driveway Safety If your driveway or paved area becomes slippery when wet, the Nutech PaveCoat AntiSlip Mix-In can be added to your sealer to improve traction. This is particularly important for sloped driveways, pool surrounds, and paving areas exposed to rain. Crommelin Enhance — Penetrating & Film Forming Concrete Sealers The Crommelin Enhance range offers a versatile selection of concrete and paving sealers suitable for driveways, pathways, and outdoor entertaining areas. Crommelin is well known for its penetrating sealer technology that protects from within the substrate rather than just on the surface. Crommelin Enhance Penetrating Sealer — Clear The Crommelin Enhance Penetrating Sealer soaks into the concrete or paver surface to provide invisible, breathable protection against water and staining. Unlike film-forming sealers, it won't peel or flake — making it a low-maintenance option for driveways and paving. Best for: Concrete, pavers, exposed aggregate, natural stone Finish: Natural/invisible — no sheen change Key benefit: Breathable, won't peel or flake, long-lasting Crommelin Enhance Gloss & Satin Finish Sealer For a wet-look or satin finish on your driveway or paving, the Crommelin Enhance Gloss & Satin Finish Sealer provides a film-forming protective coat that enhances colour and adds a decorative sheen. Available in gloss and satin finishes to suit your aesthetic preference. Best for: Decorative concrete, exposed aggregate, coloured pavers Finish: Gloss or satin Key benefit: Colour enhancement, decorative finish Crommelin Enhance WB Sealer — Water Based The Crommelin Enhance WB Sealer is a water-based film-forming sealer offering strong protection with low odour and easy cleanup. A great choice for residential driveway sealing where a water-based product is preferred. Crommelin Enhance WSi Sealer The Crommelin Enhance WSi Sealer combines water-based technology with silicone chemistry for enhanced water repellency and durability. Suitable for driveways and paving areas exposed to heavy rainfall and moisture. Crommelin Enhance Satin Tintable Sealer Want to add a subtle colour to your driveway or paving? The Crommelin Enhance Satin Tintable Sealer can be tinted to a range of colours, allowing you to refresh or change the look of your concrete surface while sealing it at the same time. Crommelin Enhance Colours The Crommelin Enhance Colours range provides concentrated colour tints to customise your sealer finish, giving your driveway or paving a unique, personalised look. Which Concrete Sealer Is Right for Your Driveway? Choosing the right sealer depends on your surface type, substrate condition, desired finish, and whether you want a clear or coloured result. Here's how to think through it: For Standard Concrete Driveways The Nutech PaveCoat Concrete Sealer is the go-to choice for most concrete driveways. It's available in both clear and a range of colours, so you can either preserve the natural look of your concrete or add a decorative tint. It provides a gloss to semi-gloss finish with excellent UV resistance and colour enhancement. For Freshly Poured Concrete If you've just had a new driveway poured, the Nutech PaveCoat Same Day Sealer (Cure & Seal) lets you cure and seal in a single step on the same day as placement — saving time and protecting the surface from the start. For Large Driveways or Paving Areas The Nutech PaveCoat Spray On Concrete Sealer is designed for efficient coverage over large surface areas using a pump sprayer. It's a popular choice for contractors and DIYers tackling big driveways, paving courts, or pathways where roller application would be slow. For Sloped or Wet Driveways If your driveway becomes slippery when wet — particularly on slopes or shaded areas — add the Nutech PaveCoat AntiSlip Mix-In to your sealer before application. It improves traction without significantly affecting the finish. For Pavers, Exposed Aggregate & Natural Stone The Crommelin Enhance Penetrating Sealer is ideal when you want invisible, breathable protection that won't alter the surface appearance. Because it soaks into the substrate rather than forming a surface film, it won't peel or flake — making it a low-maintenance option for pavers, exposed aggregate, and natural stone driveways. Nutech Agreseal clear is another option for exposed aggregate. For a Wet Look or Decorative Finish on Pavers If you want to enhance the colour and add a sheen to your paving or decorative concrete, the Crommelin Enhance Gloss & Satin Finish Sealer delivers a film-forming protective coat in your choice of gloss or satin. For a coloured or tinted result, the Crommelin Enhance Satin Tintable Sealer can be tinted to a range of shades to refresh or transform the look of your surface. Frequently Asked Questions — Concrete Sealer for Driveways What is the best concrete sealer for driveways in Australia? The Nutech PaveCoat Concrete Sealer is one of the most popular and trusted driveway sealers in Australia. It's formulated for Australian UV conditions, provides excellent colour enhancement, and is available in clear and a range of colours — suitable for concrete, exposed aggregate, and paved surfaces. The Crommelin Enhance Penetrating Sealer is also highly regarded for pavers and natural stone where a breathable, invisible finish is preferred. Does PaveCoat come in colours? Yes — the Nutech PaveCoat range is available in both clear and a variety of colours, making it a versatile choice for driveways where you want to add a decorative tint or refresh the look of ageing concrete. Check the product listing for the current colour options available. What sealer is suitable for exposed aggregate driveways? Yes. Nutech Agreseal clear is widely used on exposed aggregate driveways. It enhances the colour and texture of the aggregate while providing a protective film against water, oil, and UV damage. Where can I buy concrete sealer for driveways in Australia? Epoxy Warehouse stocks the full Nutech PaveCoat and Crommelin Enhance ranges online with Australia-wide delivery. We also have depot pickup options available. Browse our full concrete sealer range or contact our team for product recommendations specific to your project. Shop Concrete Sealers for Driveways, Paving, Patios & More Ready to protect and enhance your driveway or paving area? Browse our full range of concrete sealers from Nutech PaveCoat and Crommelin Enhance — available online with fast Australia-wide delivery or depot pickup. Shop Concrete Sealers at Epoxy Warehouse →
Read more
How Long Does Epoxy Flooring Last?
How Long Does Epoxy Flooring Last? (And How to Make It Last Longer) Epoxy flooring is one of the most durable floor coating systems available — but how long it actually lasts depends on several factors: the quality of the product, how well the surface was prepared, the type of traffic it sees, and whether a protective topcoat was applied. This guide gives you realistic expectations for epoxy floor lifespan across different environments, and practical tips to maximise the life of your floor. How Long Does Epoxy Flooring Last? (By Environment) Environment Typical Lifespan Key Factors Residential garage 10–20+ years Vehicle traffic, hot tyre pick-up, UV exposure Home interior 15–25+ years Light foot traffic, minimal chemical exposure Workshop 7–15 years Heavy foot traffic, dropped tools, chemical spills Commercial warehouse 5–10+ years Forklift traffic, pallet jacks, heavy loads Commercial kitchen 5–10 years Chemical cleaning agents, constant foot traffic, moisture Note: These are indicative ranges based on industry experience. Actual lifespan varies significantly based on surface preparation quality, product system used, and maintenance practices. What Affects How Long Epoxy Flooring Lasts? 1. Surface Preparation — The Most Important Factor No factor has a greater impact on epoxy floor longevity than surface preparation. Epoxy bonds chemically to concrete — if the surface is contaminated, poorly ground, or not fully cured, the coating will delaminate prematurely regardless of product quality. For a long-lasting result: Diamond grind the concrete Ensure the concrete slab is at least 28 days cured before coating Remove all oil, grease, laitance, and defective concrete Address any moisture issues with a moisture barrier before applying epoxy Repair cracks and voids before priming 2. Product Quality and Solids Content 100% solids epoxy systems — like Sikafloor 264 and our UltraShield epoxy kits — contain no solvents and cure to a thicker, harder film than lower-solids products. More solids = more material on the floor = longer lasting protection. 3. Number of Coats A single coat is never sufficient for high-traffic areas. All our systems recommend a minimum of two coats — a primer or first coat, followed by a second coat — to build adequate film thickness. For heavy commercial use, additional coats extend service life significantly. 4. Protective Topcoat Applying a clear topcoat over your epoxy base coat is one of the single most effective ways to extend floor life. A quality polyurethane topcoat like UltraKote UVSeal or polyaspartic topcoat like Pure Guard adds: UV resistance — prevents yellowing and chalking from sunlight exposure Abrasion resistance — protects against wear from foot traffic and vehicles Hot tyre pick-up resistance — critical for garage floors Chemical resistance — withstands oils, solvents, and cleaning agents Gloss retention — keeps the floor looking new for longer 5. Traffic Type and Intensity A residential garage floor used by one or two vehicles will outlast a commercial warehouse floor by many years, even with the same product system. Heavy forklift traffic, pallet jacks, and constant chemical exposure accelerate wear. For high-intensity commercial environments, specify a system with higher film build and a polyurethane or polyaspartic topcoat. 6. Temperature During Application Epoxy applied outside the recommended temperature range — too hot or too cold — can cure improperly, leading to adhesion failure and reduced lifespan. Always apply epoxy between 10°C and 30°C for optimal results. Signs Your Epoxy Floor Needs Attention Peeling or delamination — usually caused by poor surface prep or moisture issues Yellowing or chalking — UV degradation, typically on floors without a UV-stable topcoat Loss of gloss — surface wear, can often be addressed with a fresh topcoat Cracking or chipping — impact damage or substrate movement Staining that won't clean — topcoat has worn through, exposing the base coat How to Make Your Epoxy Floor Last Longer ✅ Do This: Apply a quality topcoat — UltraKote UVSeal Polyurethane is our top recommendation for garages, workshops, and commercial spaces Clean regularly with a pH-neutral cleaner — avoid harsh acids or bleach-based products Clean spills promptly — especially oils, fuels, and solvents Use floor mats at entry points to reduce grit and abrasive particles being tracked across the surface Add anti-slip media to your topcoat in wet or high-traffic areas — protects the surface and improves safety ❌ Avoid This: Dragging heavy or sharp objects directly across the floor Applying epoxy to green concrete (less than 28 days cured) Skipping the primer coat to save time or money Applying in temperatures above 30°C or below 10°C Using steam cleaners or high-pressure hot water on the surface Ignoring moisture issues before coating Can You Recoat an Existing Epoxy Floor? Yes — in many cases, a worn epoxy floor can be recoated rather than fully stripped and replaced. If the existing coating is still well-adhered with no delamination, a light sand and a fresh topcoat can restore gloss and protection at a fraction of the cost of a full recoat. If the existing coating is peeling, delaminating, or heavily damaged, full removal and reapplication is the correct approach. Contact our team for advice on your specific situation. Choosing the Right System for Long-Term Performance The best way to maximise epoxy floor lifespan is to start with the right system for your environment: Garage Epoxy Kits — full flake systems with UV-stable polyurethane topcoat for hot tyre and UV resistance Workshop Epoxy Systems — high-build 100% solids systems with chemical and abrasion resistance Warehouse & Commercial Epoxy — industrial-grade systems rated for forklift and heavy load traffic Not sure which system is right for your project? Talk to our team — we'll recommend the right product for your floor, traffic type, and budget.
Read more
Metallic Epoxy Flooring — The Complete Guide
Metallic Epoxy Flooring — The Complete Guide Metallic epoxy flooring is one of the most visually stunning floor finishes available — a high-gloss, seamless surface with a unique three-dimensional, marbled effect that looks different from every angle. Once reserved for high-end commercial spaces, metallic epoxy is now accessible for residential garages, workshops, showrooms, and retail environments. This guide covers everything you need to know — how it works, where to use it, how to apply it, and what it costs. What Is Metallic Epoxy Flooring? Metallic epoxy is a two-component, 100% solids, self-levelling epoxy resin system infused with metallic pigment powders. When applied, the pigments move and swirl through the wet epoxy, creating a unique, one-of-a-kind finish that can't be replicated exactly — every floor is different. Unlike standard epoxy coatings, metallic epoxy is both a decorative and functional floor system. It delivers: A high-gloss, mirror-like finish with depth and movement 100% solids formulation — no solvents, no shrinkage, maximum film thickness Self-levelling properties for a smooth, seamless result Superior adhesion to properly prepared concrete Scratch, chemical, UV, and moisture resistance Where Can You Use Metallic Epoxy Flooring? Metallic epoxy suits any space where aesthetics matter as much as performance: Residential garages — showroom-quality finish for car enthusiasts Home interiors — living areas, kitchens, and entertainment spaces Retail showrooms and boutiques — premium visual impact for customers Workshops and studios — durable and impressive Commercial and hospitality spaces — bars, restaurants, reception areas Metallic Epoxy vs Standard Epoxy — What's the Difference? Feature Standard Epoxy Metallic Epoxy Finish Solid colour, flat gloss 3D metallic, marbled effect Uniqueness Consistent, repeatable Every floor is one-of-a-kind Solids content 50–100% solids (can be 100%) typically high solids (often 100%) but system-dependent Self-levelling depends on product (can be self-levelling) typically self-levelling (required for flow effects) Application skill Beginner–intermediate Intermediate–advanced Best for Functional, high-traffic areas Decorative + functional spaces How to Apply Metallic Epoxy Flooring — Step by Step Step 1: Surface Preparation Proper preparation is critical. The concrete must be clean, dry, and free of contaminants. Repair any cracks using a concrete bog or epoxy filler, sand smooth, and vacuum thoroughly. Any moisture in the slab must be addressed with a moisture barrier before proceeding. Step 2: Apply the Primer Coat Apply one coat of Ultra Primer tinted with a Black or Charcoal Tint Pack. The tinted primer creates a dark base that enhances the depth and contrast of the metallic pigments above. Allow to cure fully before proceeding. Step 3: Patch and Sand After priming, patch any remaining imperfections using leftover primer mixed with Sikadur 513 Powder. Once cured, sand with 150-grit and vacuum clean. Step 4: Apply the Metallic Epoxy Coat Mix the Ultra Metallic 15L Kit thoroughly and add 3 Silver Pearl pigment packs per kit plus 1L of GP Thinners to reduce bubbles. Pour and spread using a flat magic squeegee, wearing spike shoes to avoid footprints. Work in sections of 15–20 sqm per kit, maintaining a wet edge at all times. Important tips: Do not apply if temperatures exceed 25°C Work as a team — one person mixing and pouring, others spreading and back-rolling Apply highlights sparingly (1–1.5L at a time) for the best swirl effect Remove bubbles with a solvent spray or low-pressure air blower Continuous mixing and pouring is essential to avoid colour inconsistencies Step 5: Apply a Clear Topcoat (Recommended) Once the metallic coat has cured, lightly sand with 220-grit and apply a clear protective topcoat. We recommend Xtreme polishing systems T200 clear coat for maximum scratch, UV, and chemical resistance. As one of our customers noted: "Good product to produce high quality metallic epoxy flooring finishes. Definitely needs a T200 or polyurethane top coat to protect it." What You'll Need — Full Shopping List Ultra Primer ( tinted black or charcoal) Ultra Metallic 15L Kits 3 x Metallic Powder Packs per kit Clear Polyurethane Uv Seal Magic Squeegees Spike Shoes 3 x 460mm Roller Trays and Frames 6 x Brushes White Rags How Much Does Metallic Epoxy Flooring Cost? The Ultra Metallic 15L Kit is priced at $350 AUD per kit, covering approximately 15–20 sqm per coat as a metallic floor. For a typical 40 sqm garage, budget for approximately 2–3 kits of Ultra Metallic plus primer, topcoat, and tools. The result is a floor that looks like it belongs in a luxury showroom — at a fraction of the cost of professional installation. Shop the Ultra Metallic 15L Kit — $350 AUD → Frequently Asked Questions Can I apply metallic epoxy myself? Yes — but it requires more preparation and teamwork than a standard epoxy kit. Read the full application instructions carefully, work in a team of 2–3, and avoid applying in temperatures above 25°C. How long does metallic epoxy flooring last? With proper surface preparation and a protective clear topcoat, a metallic epoxy floor can last 10–20 years in residential settings and 5–10 years in high-traffic commercial environments. Can metallic epoxy be used outdoors? Metallic epoxy is designed for indoor use. For outdoor or UV-exposed areas, a UV-stable polyaspartic topcoat is essential to prevent yellowing. What colours are available? Metallic pigment packs are available in a range of colours including Silver Pearl, Gold, Copper, and more. Multiple pigments can be combined for custom effects. Ready to Transform Your Floor? Metallic epoxy flooring delivers a finish that's truly one of a kind — no two floors are ever the same. Whether you're coating a garage, studio, or commercial showroom, the result is a floor that stops people in their tracks. Shop Ultra Metallic 15L Kit Browse All Metallic Epoxy Products Talk to our team for project advice
Read more
How Much Does Epoxy Flooring Cost in Australia? (2026 Price Guide)
How Much Does Epoxy Flooring Cost in Australia? (2026 Price Guide) Epoxy flooring is one of the best investments you can make for a concrete floor — but how much should you actually budget for it? Costs vary depending on the size of your space, the system you choose, and whether you go DIY or hire a professional installer. This guide breaks down realistic 2026 pricing for epoxy floor coatings in Australia, so you can plan your project with confidence. Epoxy Flooring Cost Overview — Australia 2026 The most cost-effective way to epoxy your floor is with a complete DIY kit — everything you need in one box, at a fraction of the cost of professional installation. Here's what you can expect to pay based on your space: Application System Type DIY Kit Cost (our prices) Professional Install (approx.) Garage up to 40sqm Solid Colour from $470 $2,000 – $4,500 Garage up to 40sqm Full Flake from $1,094 $2,500 – $5,000 Workshop / larger area 80sqm Flake System from $1,320 $4,000 – $8,000 Large area up to 70sqm Sika Single Colour from $900 $3,500 – $7,000 Large area up to 70sqm Sikafloor Full Flake from $2,195 $5,000 – $10,000 Note: DIY kit prices include all materials — epoxy base coat, flake chips, clear topcoat, and add on options on primer, roller kit, spike shoes, and other accessories. Professional installation costs are indicative and vary by location, concrete condition, and contractor. What Affects the Cost of Epoxy Flooring? 1. Floor Size The bigger the area, the lower the cost per sqm — bulk kits offer better value for larger spaces. Always measure your floor area accurately before purchasing. 2. System Type Not all epoxy systems are priced the same. A basic solid-colour single-coat system costs less than a full flake system with primer, base coat, broadcast flake, and a clear polyurethane topcoat. The more coats and components, the higher the material cost — but also the better the result. 3. Concrete Condition Cracked, contaminated, or previously coated concrete requires more preparation work — grinding, patching, or applying a moisture barrier — which adds to both time and cost. 4. DIY vs. Professional Application DIY is significantly cheaper and very achievable with the right kit. Professional installers charge for labour, equipment, and expertise — worthwhile for large commercial projects or complex surfaces. 5. Number of Coats A single coat is rarely sufficient for high-traffic areas. Most quality systems include a primer + 1–2 base coats + topcoat. More coats = longer life = better value over time. DIY Epoxy Flooring Cost Breakdown Our all-in-one kits are designed to include everything you need for a professional result — no guesswork, no missing components. Here's what's included: Epoxy base coat (2 coats): bonds to concrete and provides colour and durability Decorative flake chips: broadcast into the wet base coat for texture and aesthetics Clear polyurethane topcoat (UVSeal): seals the flake and protects against UV, abrasion, and chemicals Application tools: roller frames, covers, sash cutters, spike shoes, gloves, and masking tape — all included Entry point: from $470 for a solid colour garage kit covering up to 40sqm — that's less than $12 per sqm all-in. Browse our full range of garage epoxy kits & workshop epoxy systems to find the right kit for your space. Is DIY Epoxy Flooring Worth It? For most homeowners and small business owners — yes, absolutely. Modern epoxy kits are designed for confident DIYers, with clear instructions and pre-measured components. The savings compared to professional installation are significant, and the results are comparable when surface preparation is done correctly. The key to a successful DIY epoxy job is preparation. Read our guide on how to prepare a concrete floor before applying epoxy before you start. How to Get the Best Value on Epoxy Flooring Buy a complete kit rather than individual components — better value and guaranteed compatibility Measure accurately — overordering wastes money, underordering causes problems mid-job Don't skip the primer — it's the foundation of a long-lasting floor Pick up from our warehouse — save on freight for heavy orders Ready to Get a Price on Your Project? Browse our epoxy flooring systems by application and get an instant price based on your floor size: Garage Epoxy Flooring Kits Workshop Epoxy Flooring Systems Warehouse & Commercial Epoxy Anti-Slip Epoxy Flooring Or contact our team for a product recommendation tailored to your space.
Read more
How to Choose the Right Epoxy Flooring System for Your Workshop, Garage or Warehouse
Choosing the right epoxy flooring system can feel overwhelming — there are dozens of products, coverage rates, and application methods to consider. Whether you're coating a home garage, a busy workshop, or a large commercial warehouse, the wrong system can lead to poor adhesion, premature wear, or a finish that simply doesn’t perform under the demands of your space. This guide breaks down exactly what to look for so you can choose with confidence and get a floor that lasts. Why Epoxy Flooring? The Basics Epoxy floor coatings are a two-part system — a resin and a hardener — that chemically bond to concrete to create a hard, seamless, and highly durable surface. Unlike paint, epoxy penetrates the concrete and cures to a finish that resists: Heavy foot and vehicle traffic Chemical spills (oils, solvents, cleaning agents) Moisture and humidity Abrasion and impact The result is a professional-grade floor that’s easy to clean, visually impressive, and built to last for years. Garage Epoxy Flooring — What to Look For The Challenges of a Garage Floor Garage floors take a beating. Hot tyre pick-up, oil drips, and constant vehicle movement demand a system that’s both tough and flexible. A standard single-coat paint won’t cut it. Best Systems for Garages Full Flake Epoxy Systems are the most popular choice for residential and semi-commercial garages. A broadcast flake finish adds texture, improves slip resistance, hides imperfections, and delivers a showroom-quality look. Our Garage full flake packageGarage Full Flake Package is a complete DIY-friendly kit that includes primer, base coat, flake chips, and a clear topcoat — everything you need in one box. Solid Colour Epoxy is a cleaner, more minimalist option. It's ideal if you want a sleek, uniform finish without the decorative flake. Look for a system with a UV-stable topcoat to prevent yellowing from sunlight exposure. Key specs to check: Coverage rate (sqm per kit) Number of coats included Slip resistance rating Cure time before vehicle traffic Workshop Epoxy Flooring — Built for Heavy Use What Makes a Workshop Different Workshops — whether for woodworking, mechanics, fabrication, or manufacturing — demand a floor that can handle dropped tools, heavy machinery, chemical exposure, and constant foot traffic. Best Systems for Workshops High-Build Epoxy Systems are the go-to for workshops. These thicker-film coatings provide superior impact resistance and fill minor surface imperfections in the concrete. Look for systems with a minimum of 2 coats plus a polyurethane or epoxy clear topcoat for maximum protection. Anti-Slip Epoxy Flooring is strongly recommended for any workshop environment. Adding anti-slip media (such as aluminium oxide or fine aggregate) to your topcoat dramatically reduces the risk of slips and falls — especially important in areas where oils or coolants may be present. Polyurethane Topcoats offer enhanced chemical resistance and UV stability compared to standard epoxy topcoats, making them ideal for workshops exposed to harsh substances or natural light. Key specs to check: Film thickness (microns) Chemical resistance Anti-slip compatibility Recoat window Warehouse Epoxy Flooring — Scale and Performance The Demands of a Commercial Warehouse Warehouse floors face extreme conditions such as forklift traffic, pallet jacks, heavy loads, and constant use. A warehouse epoxy system needs to be engineered for industrial performance — not just aesthetics. Best Systems for Warehouses Industrial High-Solids Epoxy designed for warehouses typically feature a high-solids formulation, meaning more epoxy solids per litre for a thicker, harder film. Systems like Ultrakote Ultrashield 100% solids epoxy are purpose-built for heavy commercial and industrial environments. Line Marking and Safety Zones can be applied over cured epoxy to define walkways and operational areas. Moisture Barriers and Primers are critical in warehouse settings where concrete slabs may have rising damp or hydrostatic pressure. Always test for moisture before applying any epoxy system — a failed moisture barrier is the #1 cause of epoxy delamination. Key specs to check: Compressive strength Abrasion resistance Moisture tolerance Heavy load rating Key Factors to Consider Across All Applications Regardless of whether you're coating a garage, workshop, or warehouse, these factors apply universally: 1. Concrete Preparation Epoxy is only as good as the surface it bonds to. Proper surface preparation — including grinding, shot blasting, or acid etching — is essential. Read our guide on how to prepare a floor before applying epoxy how to prepare a concrete floor before applying epoxy for a step-by-step walkthrough. 2. Coverage Rate and Kit Size Always calculate your floor area before purchasing. Most epoxy systems list coverage in sqm per litre or per kit. Factor in a 10–15% buffer for wastage, especially on rough or porous concrete. 3. Number of Coats A single coat is rarely sufficient for high-traffic areas. Most professional systems recommend a primer coat, one or two base coats, and a clear topcoat for optimal performance and longevity. 4. Cure Time vs. Recoat Time These are different things. Recoat time is when you can apply the next coat (often 12–24 hours). Full cure time — when the floor can handle heavy traffic — is typically 5–7 days. Plan your project timeline accordingly. 5. DIY vs. Professional Application Many of our systems are designed for confident DIYers with clear instructions and all-in-one kits. For large commercial or industrial projects, professional application ensures consistent film thickness and optimal results. Quick Comparison — Which System Is Right for You? Use Case Recommended System Key Feature Home Garage Full Flake Epoxy Kit Decorative and slip-resistant Workshop High Build + Anti-Slip epoxy system Impact and chemical resistance Warehouse Industrial two coat or three coat Epoxy System Heavy-duty performance Wet Areas Anti Slip Epoxy System Improved safety Decorative Metallic Epoxy System Premium visual finish Shop Epoxy Flooring Systems by Application Ready to get started? Browse our range of epoxy flooring systems matched to your specific environment: Garage Epoxy Flooring Workshop Epoxy Flooring Warehouse Epoxy Flooring Anti-Slip Epoxy Flooring Metallic Epoxy Flooring Not sure what you need? Contact our team for expert advice.
Read more
How To Prepare A Floor Before Applying Epoxy?
Epoxy floor coatings have become the go-to choice for industrial or garage flooring. Generally considered superior to epoxy paint, homeowners everywhere are drawn to its durability and robust nature. An epoxy garage floor is versatile in its design and aesthetic options, and the relative lack of maintenance is also a massive benefit for many. It is also relatively straightforward to apply epoxy flooring to an existing concrete surface, with the steps needed manageable for the average DIYer if they cannot afford professional installers. Nevertheless, the concrete base must be primed and prepared for the installation, as skimping on this step can lead to significant issues down the road. Here we look at the key steps you will need to take to ensure your concrete flooring is ready for any epoxy applications. The cleaning process It might seem strange that what will ultimately be covered by an epoxy coating needs to be thoroughly cleaned beforehand. Still, any sign of dust, debris, and other during an epoxy installation can cause issues later. Fortunately, there are no great secrets to uncover at this stage. A careful sweep and vacuum are all that’s needed to ensure that as much dust and dirt is gone before moving on to the more involved processes. The removal of grease and oil stains is critical, which can be done by using a degreaser and a stiff bristle brush. It is also essential to be free from residual evidence of previous coatings, as this can affect the binding process when applying new epoxy flooring. You can remove any prominent areas of the last coating with a scraper. Mechanical preparation such as grinding or shot blasting may be required depending on the product or application type. Grinding is the preferred method to prepare a concrete floor. Suppose there is a clear indication of a previous coating throughout your surface. It might be advisable to sand down the entire area at this stage until no apparent signs of an earlier coating remain. If the existing coating is sound, it can be scratched using sanding machines and if it's flaking, it will have to be removed completely. Once all this has been done, you should carry out a secondary wipe-down and vacuum to leave the area free of debris. As a final step, mainly if your space saw heavy vehicle use, it might be worth going over the surface with denatured alcohol to ensure that any lingering grease spots and scuff marks are gone completely. Ensure your surface is completely dry Before installing epoxy coating, you must ensure that moisture and vapour do not linger within the substrate as part of the floor preparation process. If you live in a naturally wet or snowy area or your concrete slab is older, this stage is vital, as it is often cited that excess moisture is the leading cause of coating failures on concrete. There are a couple of observable signs that you should look out for at this stage. If there is evidence of discolouration or bubbling upon the surface of the concrete, excess moisture may be present. If there are signs of white residue on the surface, this could indicate salt left behind through evaporation, further indicating the presence of moisture. If you are concerned that excess moisture could be present, consider carrying out a simple moisture test to determine the extent of the problem. Tape a sheet of plastic to the floor and leave it be for 24 hours. If there is moisture under the plastic at the end of this time, your next step is to apply a sealer layer. This will block any deep-rooted moisture in the concrete from affecting the epoxy bonding process. If it is clear that moisture is a bigger problem, you might need to consider some form of dehumidifying or moisture barrier coating to help take care of the problem. Make sure that you keep your floor dry throughout the floor prep process. Additional prep techniques As part of the floor preparation process, you may wish to choose from three further options that will help maximise the effectiveness of the bonding process and the strength of the epoxy coating. 1. Acid etching Acid etching is the process of applying an acid-based solution to your concrete surface to widen the pores within the concrete. With wider pores in place, the epoxy coating will be more effective at binding with the concrete during the curing process, creating a much stronger and more durable layer. The benefit of this technique is that it is easily accessible to most people. However, several acid-based products are at risk of emitting harmful fumes. All that is required is a solution and a stiff bristle broom to apply the solution evenly. Excess acid must also be disposed of promptly and efficiently to remove any subsequent dangers. 2. Diamond grinding Diamond grinding involves removing the uppermost layer of your concrete slab in preparation for applying an epoxy coating. As the name suggests, the rotavating blades are tipped with diamond and are designed for grinding and smoothing your floor's surface. This technique can be used to remove imperfections on your surface. Although it will involve machinery that may need to be hired, the process is highly versatile and can fit individual needs. Most are height-adjustable and can take away as much or as little of the surface as required. 3. Shot blasting Shot blasting involves the high-pressure contact of small pelts upon the concrete surface. It is designed to disrupt the topmost layer of the concrete to widen pores and create an uneven surface ideal for an epoxy coating to bind effectively with the concrete. It serves a similar purpose to acid etching. The machine is designed to capture everything that's left in its wake. A huge benefit to this technique is that there will be little residue left over. However, the method and machinery are more geared toward larger-scale projects and might not suit residential garages. It also requires a degree of professional skill to ensure maximum effectiveness. The floor preparation phase is a deceptively in-depth process, and it is necessary to get it right. Once the epoxy coating installation has begun, it is challenging to go back and fix issues that might arise during the process that could otherwise have been dealt with earlier. It’s important to take right steps with your prep, and you’re well on your way to a perfect epoxy flooring installation. Contact us today to find the ideal epoxy coating solution for you.
Read more
The Definitive Guide to Epoxy Flooring
Are you redecorating or renovating? There are so many flooring solutions from which to choose. Epoxy resin flooring is an increasingly popular floor finish in residential, commercial, and industrial buildings. But what are epoxy floors? Our guide will cover the following: The benefits of epoxy flooring. Tips for choosing your type of epoxy floor. How to prepare your home for epoxy flooring application. What is epoxy flooring? Image credit: American Concrete Polishing And Coating Firstly, let's look at what epoxy resin floor surfaces are. The epoxy resin consists of resin and hardener; an epoxy flooring system enhances and protects surfaces. It is typically used on a concrete surface. Therefore, you'll find it on a garage, patio, and basement floor. You'll also find commercial epoxy flooring in industrial areas. The advantage of epoxy flooring is that it’s incredibly adhesive. Accordingly, it’s easy to apply and far more hard-wearing than regular floor paint. You can also use epoxy on cork and marble flooring for a protective finish. What you need to know about epoxy flooring How much does epoxy flooring cost? So, how much does an epoxy floor cost in Australia? The price depends on the following. The condition of your existing floor. How ample the space is. Your epoxy flooring options. Decorative finishes may cost more. Your flooring contractor should supply a quote based on your flooring needs. Generally, you might expect to pay between $30-35 per square metre to which you apply epoxy. The flooring cost would increase depending on the type of finish you desire. The difference between epoxy floor finishes and other types of floors in the same price range is their durability. For example, you could purchase vinyl flooring for the same price or less. However, it doesn't have the same level of protection. Image credit: Kenna Real Estate Does an epoxy floor increase home value? If you're eager to increase your home value, choosing epoxy is an excellent way to improve. Firstly, its strength and durability ensure that it's long-lasting. Secondly, epoxy flooring projects add beauty with a decorative coating without forking out too much money. For example, consider flake flooring or a metallic epoxy finish to get a unique floor to improve your house's value. What are the advantages and disadvantages of epoxy flooring? Here are some of the pros of epoxy floors: Durable floors: The adhesive properties ensure a long-lasting floor coating system that won't chip. Easy to clean: Epoxy is resistant to chemicals, oil, bleach, cleansers, germs and bacteria. Décor look: Whether you opt for epoxy flake floors, a metallic epoxy floor or polished concrete flooring, epoxy looks bright and professional. Application: You can get self-levelling epoxy flooring, ensuring a clean, smooth surface. Here are some of the cons of epoxy floors: Although not true of all epoxy floors, some floor covering types can get very slippery when wet. Epoxy resin floors contain hardeners that release nasty fumes after laying, and this might be off-putting in commercial flooring — mainly if you apply it in a commercial kitchen. How long do epoxy floors last? If you're looking for robust and resistant floors, epoxy floors are durable and easy to maintain. When installed properly, it's highly resistant to general wear and tear. A typical residential epoxy floor could last for up to 30 years or more. However, an industrial epoxy floor is unlikely to last as long simply due to more constant traffic. Commercial epoxy floor coating might need replacing or renovating sooner with more heavy-duty use. How long before you can walk on an epoxy floor? Generally speaking, you can walk around 24 hours after applying the epoxy coating. If you do the flooring job in particularly cold or humid weather, it's sensible to wait longer. Moreover, you should leave 48-72 hours before using the new epoxy coating system for heavy equipment or vehicles. How thick is epoxy flooring? Most epoxy flooring systems comprise 2-3 layers: an epoxy primer, basecoat, and topcoat. It's about 2-3mm on the concrete slab below. To increase the thickness of each epoxy coat, add a filler, such as quartz sand: the thicker your epoxy floor coating, the more durable it is. How to clean an epoxy floor? Image credit: Resin Expert The epoxy flooring material is easy to maintain. It requires very little care. However, to ensure its longevity and keep its shine, regular cleaning doesn't hurt. Try to keep the floor dirt-free. Small bits of debris can further general wear and tear. Avoid using hard soaps. These can damage your floor over time. Use soft brushes. A stiff bristle brush is too abrasive and likely to scratch your new epoxy floor system. Will epoxy floors crack? Epoxy flooring material is very substantial. However, as a result, it is also very rigid and inflexible. It is prone to cracks if the foundation beneath shifts. Therefore, proper preparation and application are crucial. To fix any damage in your epoxy garage floor coating, you need to apply another coat. With a professional overseeing the installation process, you can certainly minimise the risk of cracks. Image credit: Medium Can epoxy be painted over? To paint your epoxy floor, you need special epoxy paint. Ordinary floor paint typically isn't strong enough to cope. Firstly, choose a compatible clean paint. Secondly, you need to roughen the floor with sandpaper so that the paint has something to stick to. Make sure you do a patch test to ensure that you'll like the outcome. Use a paint roller to finish the job. Then, clean the base of any debris. Image credit: Everything About Concrete How to prep a garage floor for epoxy? If you don't hire floor installers to do the job for you, it's manageable to lay down your garage flooring yourself without extensive experience. Find epoxy kits online. Follow our steps to create smooth garage epoxy floors. Firstly, you need to prepare and clean the garage floor before applying the epoxy. Ensuring the epoxy property adheres to the concrete flooring needs a slightly rough texture. Fill in any gaps and cracks with grout. Sweep and clean the floor. You don't want any debris or dirt trapped in the garage epoxy floors when you finish the process. Prime the floor with one or two coats. To find a suitable product, search for epoxy flooring in Sydney. Apply your epoxy industrial flooring. Follow the manufacturer's instructions. Next, wait 16-24 hours before moving on to the next step. After applying your final coat, you can add decorations or an anti-slip coating. Your epoxy floor should look smooth and professional with proper care and following each step. Are you looking for quality epoxy products? Epoxy Warehouse is a leading Australian supplier of Epoxy and Polyurethane products widely used by trade professionals and DIY users daily. Our products are used in industrial, commercial and residential projects to repair, beautify and protect concrete surfaces. Our products are competitively priced to allow you to shop with confidence, knowing you will get the best products at trade prices. Whether you are completing a DIY for your home or a trade person working on a client’s floor, we will supply you with the required floor coating materials for your project needs. From the conception of a project to its completion, our experienced experts are available to answer all your questions. We ship Australia-wide with depot pick-up options available in Sydney, Brisbane, Melbourne, Canberra, Hobart, Adelaide, Darwin, and Perth. Get in touch with Epoxy Warehouse today.
Read more
Commercial Kitchen Floors
Epoxy flooring is a popular option for commercial kitchen floors. The seamless finish they provide leaves no room for bacteria to grow and is easy to keep clean and maintain. To be able to receive the green light from the local authorities and operate safely, all floors in food prep areas must have their floors sealed and all wall-to-floor junctions must have coving to prevent build-up of contaminants. You can either use aluminium coving or epoxy coving can be done. As most commercial kitchens are washed regularly, it’s a good idea to invest in installing a few extra drainage points in the area and creating falls to drainage points using epoxy screed. Epoxy screeds are extremely durable and will be compatible with most epoxy top coats. The following products will be suitable to be used in Food preparation areas: Ultrakote Epoxy Coving & Patching Mortar Aluminium Coving It’s important to know what proper standard and high-quality materials to use for your commercial kitchen. Not only to meet standards but also to ensure safety and longevity. For reliable epoxy suppliers in Sydney, trust Epoxy Warehouse. We are a one-stop shop for all your epoxy floor coating project requirements. Browse our products today!
Read more
What is Epoxy Flooring and Its Benefits
The flooring of any space has an important role to play. It doesn't just create an aesthetic it also offers safety features and facilitates daily tasks. Whether you are dealing with residential flooring or a commercial and industrial setting, you need to invest in floor coatings that will withstand the space's normal activities. Epoxy coatings are particularly popular because they are easy to clean, and they stand up to heavy wear and tear for long-term application.What is Epoxy Flooring?Firstly, it is worth pointing out that epoxy is much more versatile than you have been led to believe. While it has long been popular in industrial settings or working environments, it is also a suitable solution for residential properties. Whether you need an anti-slip floor solution in the bathroom or you have a concrete floor in your kitchen that needs an upgrade. So, the image you have of a single option repeated across a series of sterile or professional environments is false.Epoxy flooring is a floor coating that is applied once a concrete surface has been prepared. Whether you diamond grind or shot blast your surface, the flooring needs to be smoothed and prepared for the epoxy coatings. This preparation ensures that the coating is absorbed and adheres to the surface properly. A two-part solution, once the hardening chemical and resin are combined it creates a chemical reaction to effectively transform the floor coating into hard plastic once it cures. Before choosing epoxy, learn which type of epoxy is right for the types of flooring you are covering.Epoxy Floor Coating BenefitsEpoxy floor coating comes with a lot of benefits from it is cost-effectiveness and chemically resistant properties to its durability and maintainability. If you are thinking about an epoxy floor coating, check out the benefits below. Durability One of the biggest benefits of applying the epoxy coating to flooring is it is highly durable. It can stand up to heavy foot traffic, equipment, and vehicles. It's far tougher than even the most conventional flooring solutions. Why is epoxy better than simple concrete? It hardens to prevent cracks, chips, and stains. When you drop a tool, you can rest assured your floor is safe. Maintainable The maintenance of epoxy coating is simple. Thanks to its glossy, resin finish it is easy to mop and wipe down after spills. You don't need to worry about staining or blotches. It also prevents bacteria and mould growth because it is a hygienic solution that slips into every nook and cranny. Aesthetically Pleasing Many people fall into the trap of envisioning a very industrial looking floor coating when they hear epoxy mentioned. There are a vast array of colours and finishes to choose from. You can opt for flaked epoxy, polished, or metallic. If you are coating residential or commercial flooring polished concrete oozes style and sophistication. And a flaked epoxy is ideal for wet areas in need of extra anti-slip grip. Cost-Effective As popular as vinyl and hardwood are, neither can beat epoxy coating when it comes to pricing. Epoxy flooring systems are one of the most cost-effective flooring solutions available. It is an affordable solution to start with, but it is a long-term investment as well. If installed correctly, an epoxy flooring system can last up to ten years. Part of its cost-effectiveness is down to the fact that it is easy to maintain. You don't need to worry about heavy cleaning equipment or product because epoxy is stain-resistant. It is a clean as you go flooring system. Slip-Resistant Finally, epoxy flooring is an excellent health and safety approved flooring solution. Since it is impregnable to moisture, there is less risk of slips, trips, and falls. Opting for epoxy with a slip-resistant additive makes it safe for use at home, in the office, garage, warehouses, and shop floors. It will keep your family, employees, and customers safe. That is why it has become such a stalwart across industries and in professional spaces. It is a flooring solution you can rely upon without much fuss.There are a variety of epoxy coating options, so be sure to research which option might be right for the type of flooring you have and the needs of your space. If you want to learn more about epoxy flooring installations, consult the professionals for expert advice. Epoxy Warehouse has stores all over Australia and is a stockist of the major epoxy brands. You can shop online or visit us in-store. Whether you need residential solutions for your driveway, garage floor, walkways or living spaces or commercial cover for showrooms, schools, storage facilities, retailers, or office buildings. We can also service industrial clients, whether you have a food processing plant, a factory or a warehouse.
Read more
How To Apply Anti-Slip Epoxy Flooring
A slippery floor could be a health and safety disaster, whether you have kids racing around the house or workers operating in a garage. If you opt for an epoxy floor coating system, you need to consider anti-slip additives. Epoxy floor paint is an excellent solution and an anti-slip additive will make your charming new floor a safe one. You can shop multiple colours and shades, and make it the perfect match for any room. Applying a non-slip coating won't just reduce the risk of accidents, it will always keep the floor looking newer for longer. Before Applying Anti-Slip Epoxy Flooring If you plan to apply epoxy flooring, whether it's the garage floor, an industrial kitchen or a warehouse, there are a few factors to address first: Check the floor for moisture. You can do this by covering the area with plastic and leaving it overnight. If you find moisture marks on the corners of the plastic later, you know the epoxy will not work. If there are no marks, you can proceed. If you see beading, it's a sure sign of concrete sealer which means you can't use epoxy. Prepare the floor. There are two considerations here. Acid etching on new concrete: Use a degreaser to remove any oil Mix 1 part hydrochloric acid with 10 parts of water and brush this onto the floor Wash the surface with clean water and allow to dry completely Fill any cracks using epoxy fillers and allow to cure Sand over the filler to make sure no residue is left behind. An 80-120 grit sand paper should suffice Vacuum the floor to ensure no dust remains - vacuuming is the most effective way to ensure you get all debris Existing concrete with coating on it Degrease the heavily affected oily area Diamond grind the floor to remove the existing coating and top layer of concrete Vacuum dust and fill any imperfections using epoxy fillers Sand over the filler, as above Vacuum the floor When floor is completely dry, apply epoxy primer Applying Epoxy Floor Coatings Once the steps above are complete, you can move on to applying your anti-slip epoxy coating. You can use a primer or move onto the slip resistance epoxy. Follow the instructions on your chosen resistant surface epoxy and wear the correct safety gear as you mix your epoxy. Follow these steps: Step One: Mix the epoxy flooring product as per manufacturer’s instructions. Remember: On 25-degree days epoxies have 20 minutes of pot life, so only mix as much as you can apply within 20 minutes Step Two: Cut the corners using a good quality brush. Step Three: Dip your industrial cover roller into the tray and start rolling. Make sure you apply an even coat of primer to your floor. Wait for it to cure (usually a few days). Step Four: Once your epoxy has cured, return and sand down any high points. Also, fill any cracks with epoxy fillers. Step Five: Vacuum the surface Step Six: Mix Part A and B together. Step Seven: Add anti-slip media (such as clean silica sand, aluminium oxide or floating anti-slip media) to your mix or broadcast it over wet film. Step Eight: Using a good quality brush, start cutting and then apply an even coat of epoxy to the floor using industrial grade roller covers. Step Nine: While it’s still wet, use epoxy flooring spikes and walk on the film, then back roll the epoxy to achieve a uniform finish.
Read more


